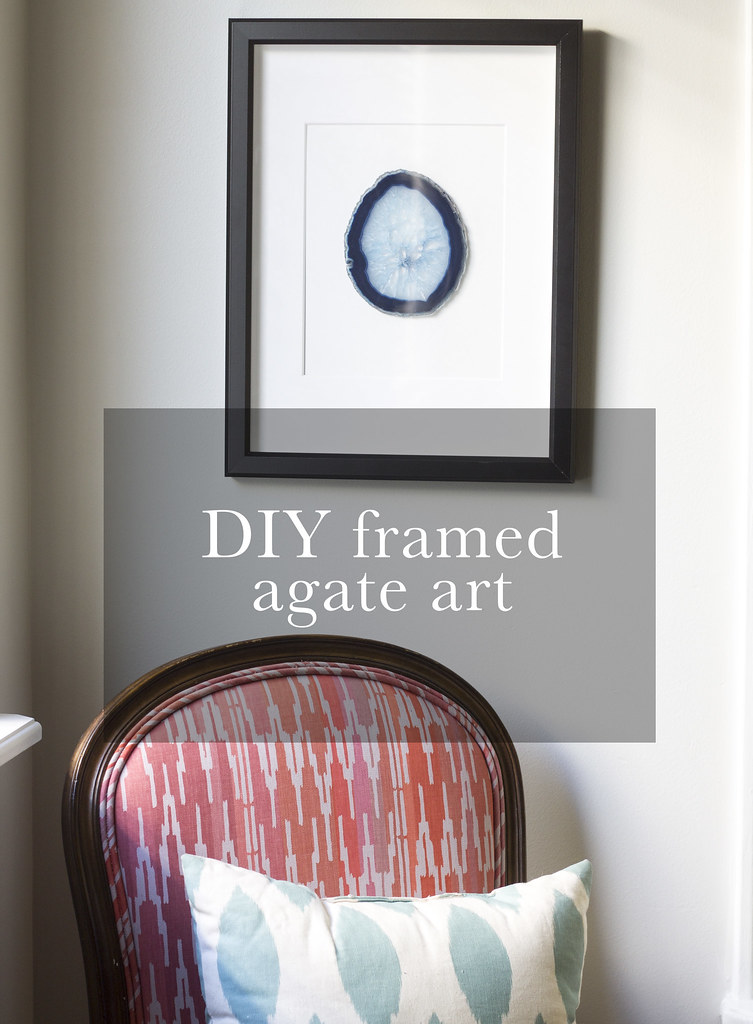
Confession: I was the kid who had a huge collection of rocks, shells, and fossils, and spent 90% of my time walking staring down at the ground just in case there might be something amazing there. So I'm really loving the framed rock trends (example here). What I don't love is the price.
On our last trip to Moab I knew I'd be trying a DIY rock art project in the near future, so we kept an eye out for any pretty specimens (especially agate, because they're thin and easy to frame). We saw plenty of interesting rocks, but honestly the prices still seemed a little out-of-control to me. On the way home from Moab, we stopped in a little town called Helper and found Utah's Treasures. I was in heaven. The selection was awesome, the prices were more than fair, and they even had gorgeous framed butterflies (one of which will make an appearance on my styled shelves in the next few weeks). If for any reason you ever pass Helper, make sure to stop by.
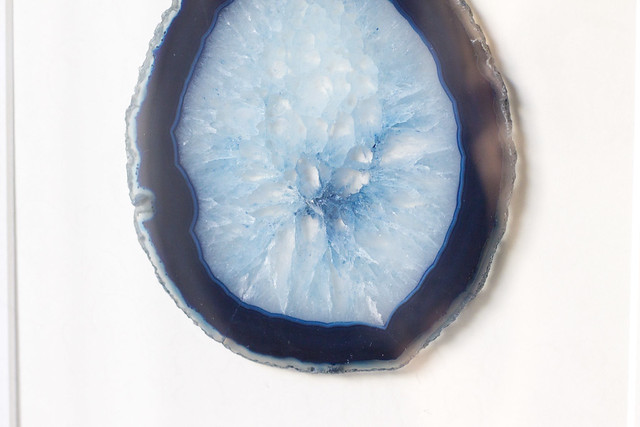
We picked up a large blue agate and were in business. I didn't take any pictures of this process because it's pretty hard to mess up. So without further ado, let's begin.
Note: If you don't have a rock shop nearby, you can purchase agate slices on Etsy, but the inexpensive ones tend to be on the smaller side (2-3 inches) and often aren't very round.
Materials
Agate (of whatever size you prefer)
Frame (we went with the Gunnabo from Ikea because it was inexpensive, had a mat, and was deep enough)
Hot glue gun
White posterboard or painted cardboard
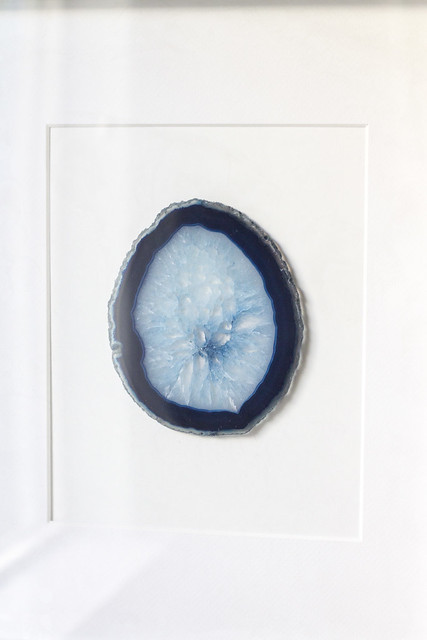
When you purchase your frame, you want to make sure your agate will fit inside the mat. After you bring your frame home, take out the paper backing and use that to trace and cut out a piece of white posterboard that will fit inside the frame. Once you ensure the posterboard fits into the frame, it's time to glue on the agate.
I made a little dot on the center of my posterboard rectangle to make sure I glued my agate in the right place (you want it to fit within the mat - you can take out the glass/styrene and place the mat on top of your posterboard to find the right position for your agate). Mine was clear and crystal-y in the middle, so I chose to apply my glue in a thin circle around the dark edges of the agate (and you can't see the glue line at all). I was a little worried that the hot glue wouldn't hold, but so far it's been hanging up for two weeks and I haven't had any problems. If you have a stronger type of glue you'd prefer, go for it! I just didn't really want to add any extra expense to this project and I already had hot glue.

Excuse the glare in the last picture (and the fact that you can't even see the agate), but this gives an idea of the size of the frame. I'm pretty happy with the way it turned out and I love seeing it from the kitchen when I'm cooking dinner (I admire it when I'm not yelling at the puppy to stop chewing on my rug/crawling under the sofa where I can't see him/bringing sticks into the house).
No comments:
Post a Comment
I'd love to hear from you!