Monday, October 19

The master bedroom plan

Our living room (the most-finished space in our house) is almost ready to share, but until I get the finishing touches done we're going to be chatting about our master bedroom (which is still a work in progress)! In our apartment the master bedroom was our least-pretty space, mostly because nobody ever saw it and it became the catch-all for random things we didn't know what to do with. So in this house, I was determined to come up with a relaxing, polished space I wouldn't be embarrassed about.

bedroomdesign
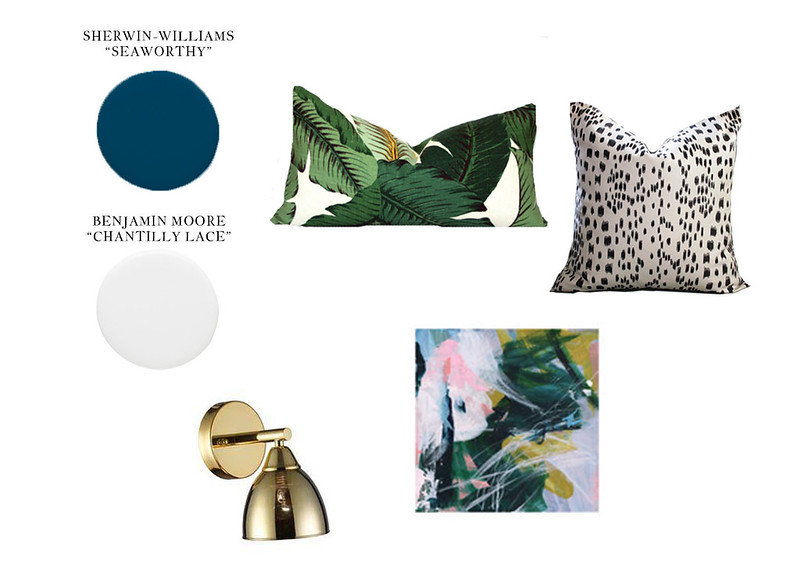
I knew I didn't want to go too feminine because John does actually live here and does actually have opinions (shocking!). I chose the Banana Palm Lumbar Pillow from Stuck on Hue and when it came I was ecstatic. So pretty and well-made . . . but I definitely should have ordered it in a bigger size (I chose the 11x17"). Don't do what I did! Go for a bigger size! I was also really in love with these Les Touches pillow covers, but I'm going to be totally honest here: I can't pay $65 for one pillow cover and I needed two. So I painted my own. Do they look as good as the originals? Hah. No. But they're similar and don't break the bank.

I was dying to put gold sconces on our navy accent wall above the bed, but again: new house. Newlywed budget. Lots of home projects left to do. So keep your eyes peeled for an Ikea hack that I'm pretty pleased about (but won't be sharing a tutorial for because I've seen others out there and can't claim I came up with the idea).

The amazing artwork is from Minted. It's called Arm in Arm and it's by Jennifer Daily. I'm obsessed with it and it's even better because I got it for free after Minted had me take a survey for new artists and gave me store credit for doing so (you can check out my photo here). I chose the 24x24" print, but wasn't completely sure how I was going to frame it because it's not a common frame size and custom framing can cost a fortune. Then I discovered ArttoFrame.com. I got the correct size frame for around $20 (I chose styrene instead of glass). They shipped it out the day I ordered (who does that?!) and I'm really impressed. It's well-made and definitely doesn't feel cheap, and it doesn't bother me at all that I didn't choose the more expensive glass option.

One of the biggest challenges of this redesign is that our master bedroom doesn't get a lot of natural light. I wanted an all-navy room originally, but realized it would probably end up feeling like a cave, so we compromised by doing one navy wall and three white. Before John left DownEast we also bought the La Jolla Upholstered Bed in the tan option (which isn't shown on the website), so I was excited to have a complete bed instead of just a headboard and rails.

Here's the before so you can get a good idea of what we're working with (tan walls, dark tan trim, tan carpet...) before
bedroom
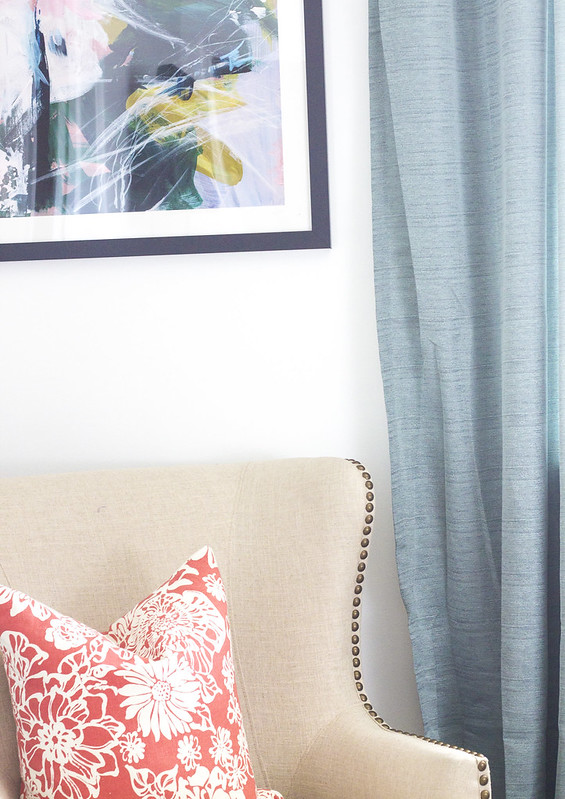
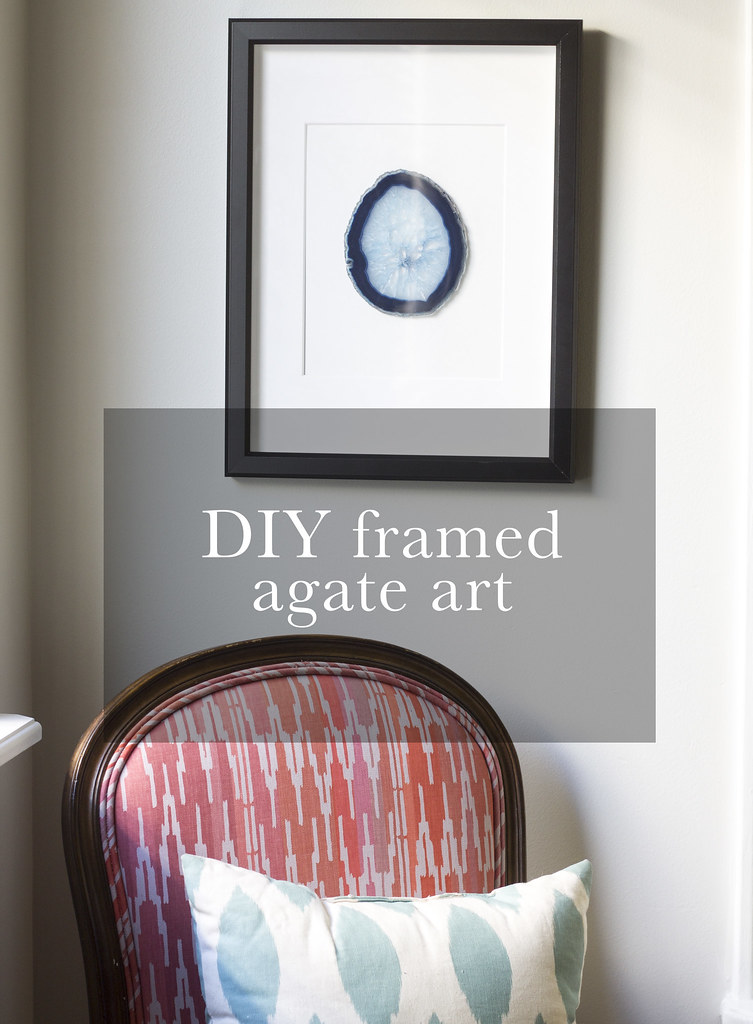
Here's a little sneak peek of a corner of the room. I'm not sure when the final reveal will be posted - we still have plenty to do and I'm still figuring out the best way to photograph it with the lenses I have.

Have any of you been working on home projects? What's your secret to staying focused on just one space instead of starting seven projects simultaneously? Ha.

Wednesday, October 14

DIY framed agate art

agate
Confession: I was the kid who had a huge collection of rocks, shells, and fossils, and spent 90% of my time walking staring down at the ground just in case there might be something amazing there. So I'm really loving the framed rock trends (example here). What I don't love is the price.

On our last trip to Moab I knew I'd be trying a DIY rock art project in the near future, so we kept an eye out for any pretty specimens (especially agate, because they're thin and easy to frame). We saw plenty of interesting rocks, but honestly the prices still seemed a little out-of-control to me. On the way home from Moab, we stopped in a little town called Helper and found Utah's Treasures. I was in heaven. The selection was awesome, the prices were more than fair, and they even had gorgeous framed butterflies (one of which will make an appearance on my styled shelves in the next few weeks). If for any reason you ever pass Helper, make sure to stop by.

agate
We picked up a large blue agate and were in business. I didn't take any pictures of this process because it's pretty hard to mess up. So without further ado, let's begin.

Note: If you don't have a rock shop nearby, you can purchase agate slices on Etsy, but the inexpensive ones tend to be on the smaller side (2-3 inches) and often aren't very round.

Materials
Agate (of whatever size you prefer)
Frame (we went with the Gunnabo from Ikea because it was inexpensive, had a mat, and was deep enough)
Hot glue gun
White posterboard or painted cardboard

When you purchase your frame, you want to make sure your agate will fit inside the mat. After you bring your frame home, take out the paper backing and use that to trace and cut out a piece of white posterboard that will fit inside the frame. Once you ensure the posterboard fits into the frame, it's time to glue on the agate.

I made a little dot on the center of my posterboard rectangle to make sure I glued my agate in the right place (you want it to fit within the mat - you can take out the glass/styrene and place the mat on top of your posterboard to find the right position for your agate). Mine was clear and crystal-y in the middle, so I chose to apply my glue in a thin circle around the dark edges of the agate (and you can't see the glue line at all). I was a little worried that the hot glue wouldn't hold, but so far it's been hanging up for two weeks and I haven't had any problems. If you have a stronger type of glue you'd prefer, go for it! I just didn't really want to add any extra expense to this project and I already had hot glue.
  agate livingroom
Excuse the glare in the last picture (and the fact that you can't even see the agate), but this gives an idea of the size of the frame. I'm pretty happy with the way it turned out and I love seeing it from the kitchen when I'm cooking dinner (I admire it when I'm not yelling at the puppy to stop chewing on my rug/crawling under the sofa where I can't see him/bringing sticks into the house).

Thursday, October 8

Remington at eight weeks

There is absolutely no point to this post other than I can't even handle how cute this puppy is (when he's not biting/chewing/having accidents). I could definitely just instagram one of these pictures but the thing is that my last THREE posts have him in them and a fourth would really plant me solidly in "crazy dog lady" territory.

So basically what I'm trying to say is if you hate puppy eyes or little white whiskers or happiness close your browser now.remi remi remi remi remi
If our future children are half this cute, I'll die happy. Although I'd prefer they be less furry and less crazy about a game Remi fondly plays called bite the toes and RUN AWAY AS FAST AS YOU CAN.

Tuesday, October 6

Monster treat tags

This is a throwback to last year, but I love these tags so much I'm posting them again (plus we've been crazy busy working on our house and I'm so excited to share everything but I'm sometimes a perfectionist and it's not quite ready for the world to see).

I whipped up a batch of Golden Graham S'mores and knew I needed a tag to go with them, so I designed these little monster printables: treat treat
Just print, cut, and tie/glue and you have a perfect Halloween-without-being-over-the-top-orange-and-black label for any treats you make. I have a couple other Halloween-themed projects to share throughout the month so check back for more!

To download the monster treat tags, click here